As I mentioned in my earlier post, much of the directions for how to do this came from the following site, to which I am truly grateful.
Now, I also found schematics for the CDM1 on a site called “Elektrotanya”. Now, I am not so sure this site is entirely legit, so I won’t link to it directly, but I am sure you can search for it and find it. To be honest though, you don’t really need the schematics for what I did. Removal of the tweeter from the cabinet is really quite easy.
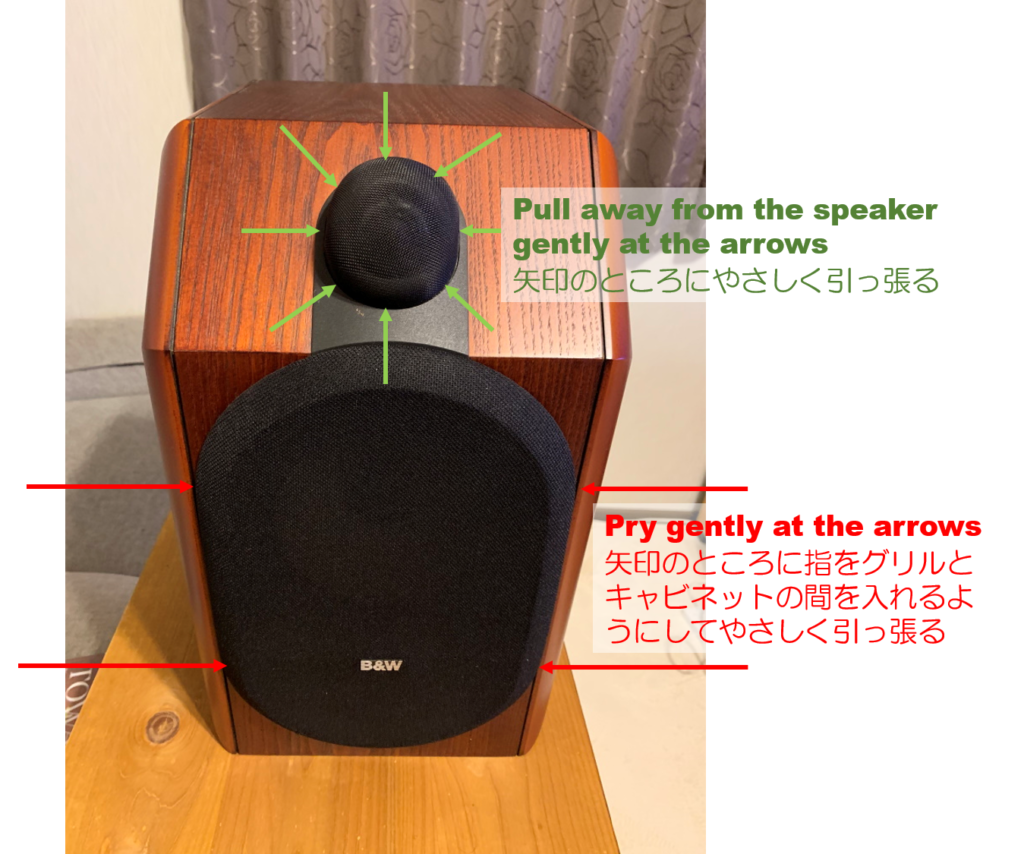
- First, remove the speaker grills. The one covering the woofer just comes off by prying gently at the sides. The one covering the tweeter is a bit harder. Get as many fingers around it from both hands as you can, and pull slowly outward, maybe rocking slightly as you pull. The grill is attached to a plastic ring that sits in a groove, and the ring/grill should come off together.
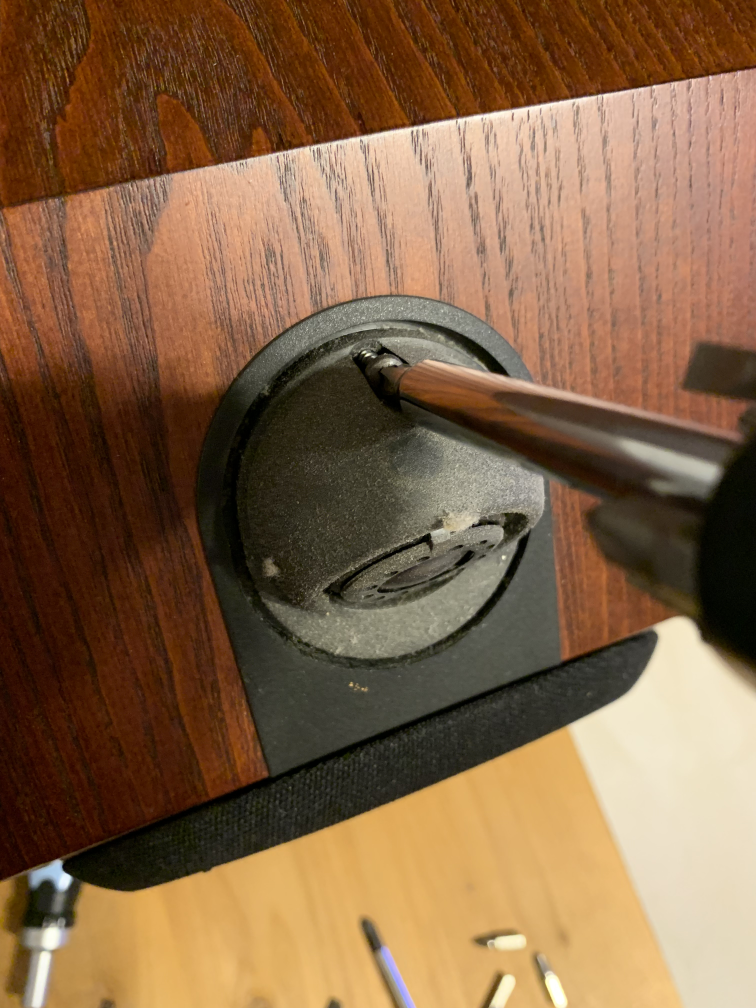
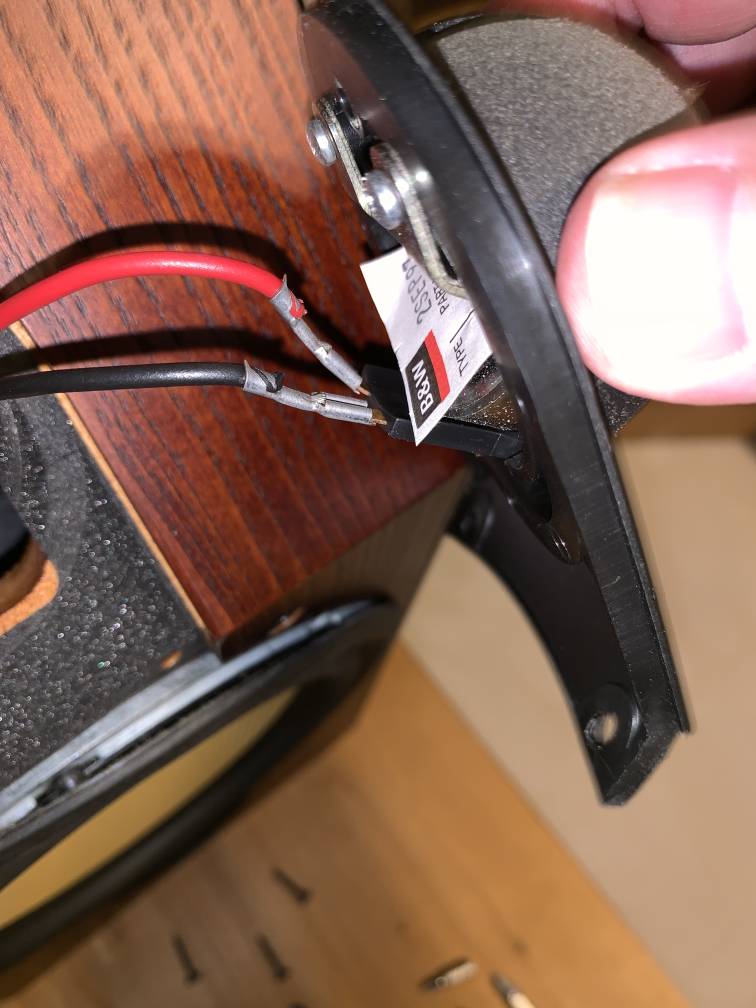
2. Remove the tweeter assembly. The tweeter assembly is fastened to the speaker cabinet with three screws. One is on top. Be sure you have a Phillip’s screw driver ( + driver) with the right size head to avoid shaving off the screw head.
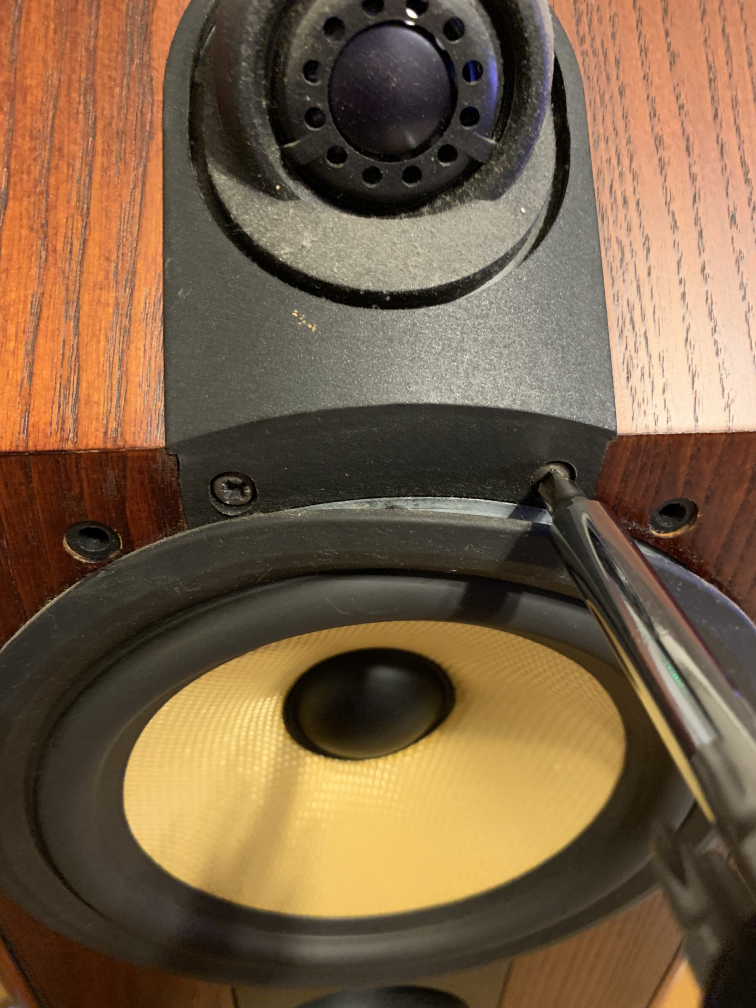
To get at the two screws at the bottom of the tweeter assembly, carefully lift the rubber woofer flange to fully expose the screw heads. It may be a bit brittle, so don’t move it any more than necessary or you risk it falling apart.
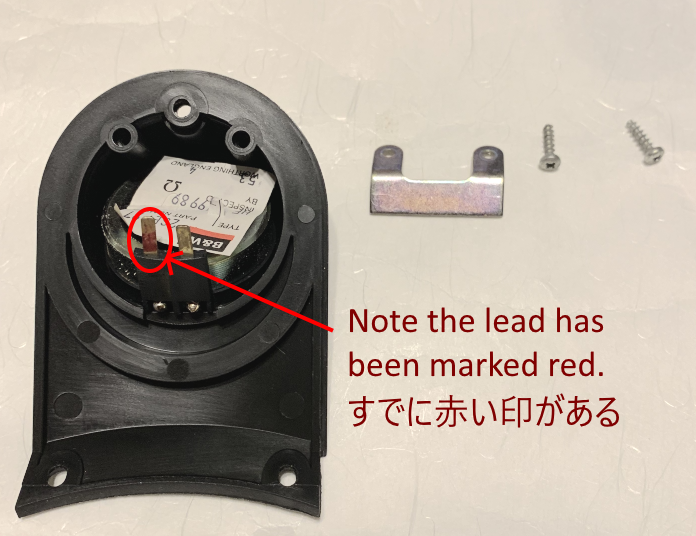
3. Unhook the speaker wires. The wires have terminals that will just slide off the speaker lead plate. The OEM tweeter already has one lead marked with RED color, so you are probably OK, but this might be a good time to snap a photo so you can remember which is which. Also, taping the wires to the cabinet with electrical tape before you let them go can save you from having to hunt in the inside of the cabinet for them later.
4. Remove the driver from the plastic housing. The tweeter is held in place in the plastic housing by a metal bracket. You just need to remove the two screws and set the bracket aside. Note that under the part number label, there is a felt pad that is meant for the metal bracket to push against to dampen any vibrations. Leave this intact.
The driver is just sitting in the plastic housing. You can remove it by pulling on the plastic that houses the leads.

Once the tweeter is removed from the housing, it is probably a good time to wash the housing to give it time to dry while you are doing the other work on the tweeter itself.
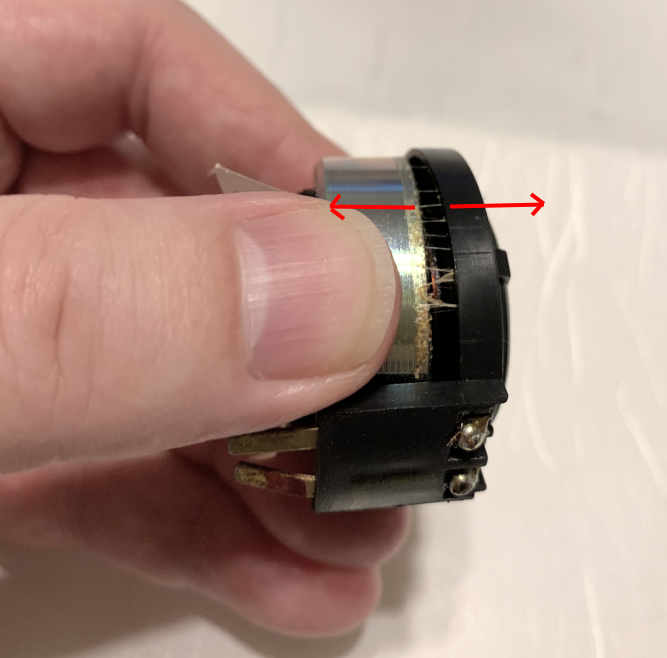
5. Disassemble the tweeter driver. The magnet and the dome/voice coil assembly are held together with glue. Holding the magnet firmly in one hand, use your fingernails and slowly pry the dome assembly away. Try to move around the circle so that it separate evenly to avoid damaging the voice coil.
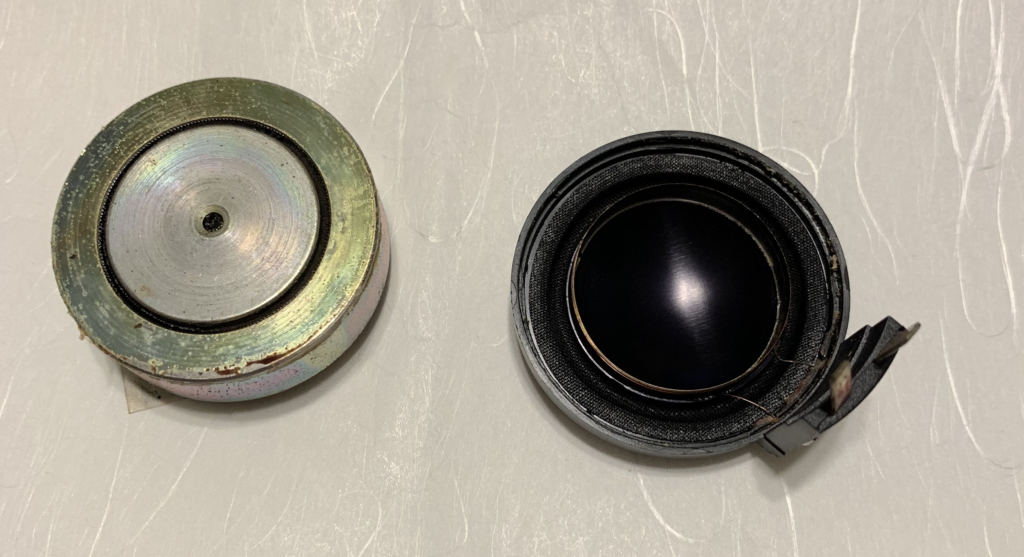
It is probably best to check the dome/voice coil assembly for any noticeable damage. If you see any, you will probably need to replace the tweeter entirely.
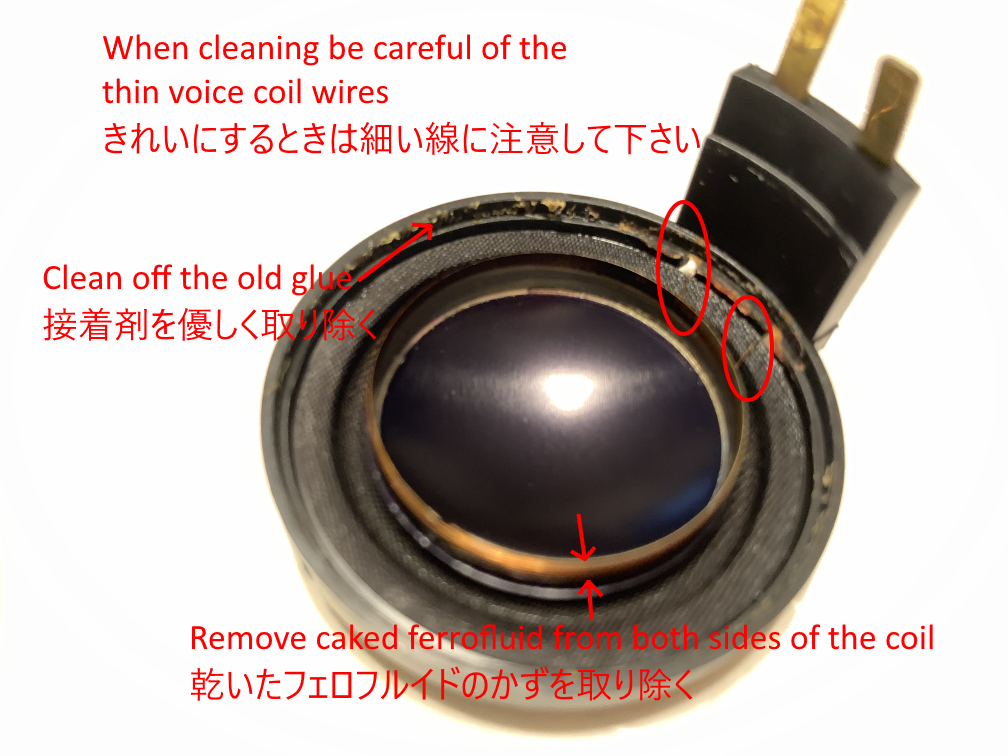
6. Clean the dome/voice coil assembly. You will need to clean off the old glue that is around the outside ring. Be very careful not to break the very thin voice coil wires while doing so. I found that using alcohol and a wooden toothpick followed by a cotton swab did the trick.
You will also need to clean off the dried ferrofluid from both the voice coil and the inside edge of the dome. I used alcohol and a cotton swab for this. One thing to watch on the inside is there is a joint that the cotton fibers can get stuck in, so be especially careful there.
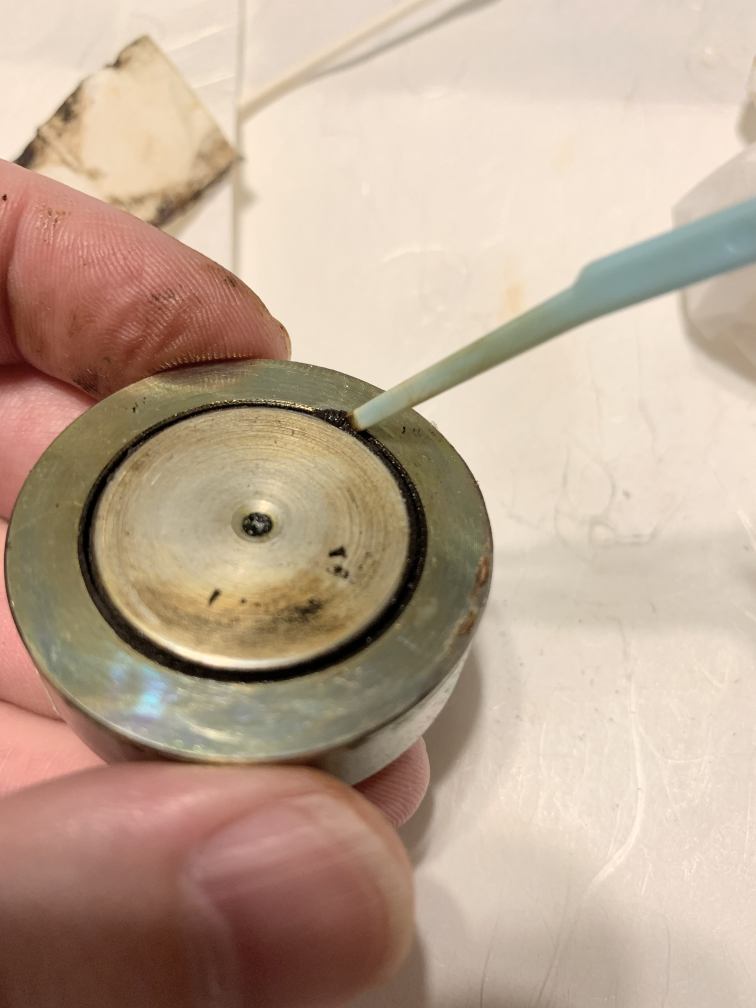
7. For cleaning the ferrofluid left in the magnet, I first tried the “insert paper” method. That got some out. What worked the best for me was to pour some alcohol in the crevice between the magnets, and then use a plastic toothpick and go all all the way around, bringing up particles as I went along.
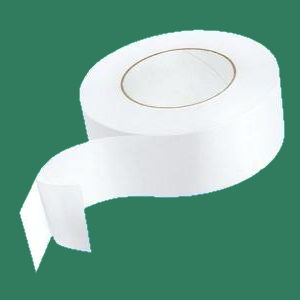
Many of the particles that were originally in the ferrofluid will stick to the magnets. About the only way to get them out is to use tape. I used some slightly thick double stick tape with the waxy paper still intact on one side. That allowed me to slip the tape between the magnets, then once inside I could push the tape against one wall, and slide it around to pick up particles. I repeated this for both the inside and outside walls until the tape was more or less clean.
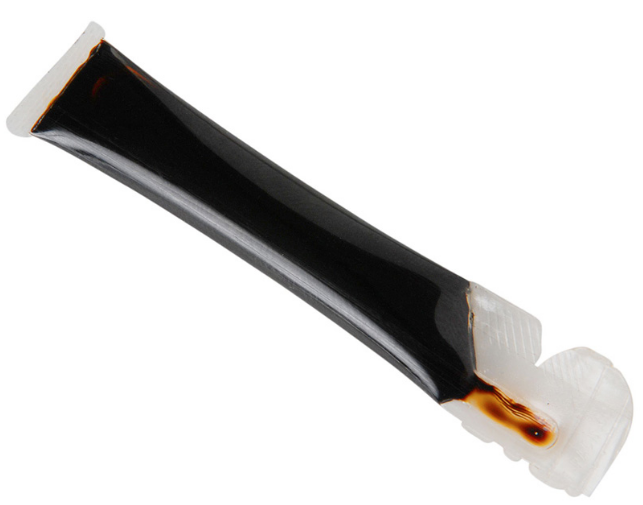
8. Replace the ferrofluid. Once you have cleaned everything and allowed time for any alcohol to dry, it is time to replace the ferrofluid in the magnet. This stuff may be a bit difficult to find. I live in Japan, and so procured mine from an eCommerce company called Baysidenet.
http://www.baysidenet.jp/c-item-detail?ic=0844632086328
I found what looks like the same stuff on Amazon.
It takes a very small amount of ferrofluid to fill the gap between the magnets. Both times I did this, I filled the entire cavity. It seemed prudent to then insert some paper and suck up some of the fluid, as when the dome/voice coil assembly is reinserted into the cavity, it will likely overflow.
9. Reassemble in the opposite way that you took everything apart. I did not worry about gluing the dome/voice coil assembly onto the magnet. I just squeezed the pieces together. These are held in place well by the metal bracket that pushes against the felt on the back of the magnet. As far as I could tell, I had no leaks.
10. Listen and enjoy! My tweeters both worked properly after doing this. As one might imagine, there was a huge difference once the tweeters were working again.
Remarks: I have seen other posts that said they did NOT replace the ferrofluid, and everything sounded just fine. I do not dispute this. While the one property of the ferrofluid is supposedly to be a coolant, I kind of doubt whether it is 100% necessary for average use. The ferrofluid is also supposed to dampen the sound somewhat. Those who prefer a brighter sound may prefer the tweeters without the ferrofluid. Personally I liked the original sound, so wanted to stick as close as I could to the original state.